The Tumbukiza method, which originate from Kenya, has been known to improve grass yield (by about 2x) and drought tolerance. The grass will grow longer into the dry season before the leaves start dying off. This means that feed will still be available during part of the dry season. But with irrigation, dry season will lose its significance.

Tumbukiza Method
Courtesy of FAO.org
There are 2 types of Tumbukiza method: The round pit type and the rectangular pit type.
Round Pit Type: Dig a pit 60cm in diameter and 60cm deep, leaving 60cm space between the pits.
Rectangular Pit Type: Dig a pit 60cm deep and 60-90cm wide. The length of the pit will depend on the available land, but it should be as long as possible. Leave 90cm space between pits. Rectangular pits that are long make more economical use of land and are easier to irrigate.
When digging the pits, separate the fertile top-soil from the less fertile subsoil. Mix 1 part top-soil with 1-2 part manure (by volume. E.g. 1 wheel barrow of top-soil and 1-2 wheel barrow of manure) and use it to fill the pits, leaving about 15-20cm unfilled space at the top. Subsoil is spread between the pits.
Planting
Before planting, allow 1 week to pass so that the topsoil-manure mixture will settle. Alternatively, water the pits thoroughly and plant.
Napier grass can be propagated from cane cuttings, root splits or whole stem. It is an aggressive plant that spreads through underground rhizomes. Brachiaria grass is another type of grass that is better than Napier grass. It can be propagated vegetative like Napier grass and from the seeds it produces.
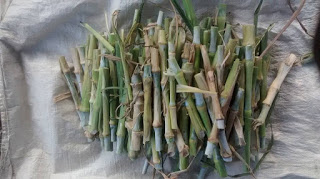
Napier Grass Canes
Courtesy of Sureshgoatfarm.blogspot.com.ng
Cane Cuttings: Cane cuttings should have 3-4 nodes and when planting them, bury all the nodes except 1. To ensure high yield, get cuttings from plants that are about to flower and their stems should still be green.
Root Splits: Root splits will grow faster than cuttings. To get splits, cut Napier grass stems at ground level to remove all the green material. Dig up the clump of roots and shoots growing underground. Separate each seedling from the clump. Each seedling must have both roots and a shoot. Trim the roots to about 5 cm (2 inches) long. Plant by covering the roots with soil and leaving the shoots above ground.
Whole Stem: Here, the stem is not cut into smaller lengths to form cuttings. They’re planted whole, laying them horizontally on the ground and covering with soil. They will grow fast and cover the ground more quickly.
Seeds: Brachiaria grass can also be propagated from seeds. Seed rate is 2-3kg per acre. You may plant 2-3 rows of seeds in each pit or first plant in a nursery with a spacing of about 5cm between rows. Transplant when they reach 6-8 weeks. Plant seeds at a depth of 1-2cm and water deeply.
After planting, water immediately.

Napier Grass Root Split
Courtesy of thekebun.wordpress.com
Round Pits: For napier grass, plant 5-10 cane cuttings or single root splits per pit. Less may be use for Brachiaria grass because of their rapid growth.
Rectangular Pits: Plant cuttings or single root splits with 9-18cm spacing between them. Plant Brachiaria root splits or cuttings at 50cm between rows and 25cm between plants because they’re more aggressive in growth.
Management Practices
1. Remove weeds by hand. Once the grass start multiplying, there will be less and less weeds to worry you.
2. The spaces between the pits can be used to grow crops like sweet potatoes.
3. Fertilize with manure and/or chemical fertilizer after every 4 to 6 harvests. In addition to nitrogen and potassium, Napier grass consume a lot of calcium and magnesium. So you may want to supplement with Calcium sources (calcium ammonium nitrate, burnt bones or egg/snail shell) and Magnesium sources (Epsom salt [MgSO4],). ],). A soil test will help you know the correct amount of fertilizer to use, but a general recommendation from A.B. Orodho is as follows:

Tumbukiza Pits
1. 20 kg/ha/year of P in the form of either single or triple superphosphates (SSP or TSP) at a rate of 100 kg/ha applied twice a year as a ring application around the stools at the beginning of the long and short rainy season on weeded plots.
2. 75 kg/ha/ of N usually in the form of Calcium Ammonium Nitrate (CAN) at a rate of 300 kg/ha to be applied in splits after every grass harvest (except the harvest taken during the dry season, because of low soil moisture) or in three equal doses in a year, during the long rains and short rains.
3. 25 kg/ha/year of K usually in the form of Muriate of Potash at a rate of 40 kg/ha/year, to be applied in the same way as phosphate.
4. Dairy cattle slurry: this is a mixture of cow dung, urine, and feed left over, available from the zero-grazing stable. The rate of application is 5.5 tons of DM/ha/year or 55 tons of liquid slurry. This should be buried between Napier grass rows to avoid loss of nitrogen by volatilization. The slurry is applied after the onset of long and short rainy seasons.
5. Leaving crop residues, feed refusals, mulching, old Napier grass leaves, stalks and other weed trash in the field to cover the soil. An even layer of mulch should be applied between grass rows, ideally after every harvest. The advantages of mulching are: to help conserve moisture and nutrients in the soil, to suppress weed growth and to maintain the soil temperatures for optimal microbial activity.
The above recommendation will help you achieve and maintain high yields for Napier grass. And I believe it can also be used for other grasses if you can’t do a soil test.
Intercropping napier grass with legumes like Desmodium, Pueraria phaseoloides, Centrosema pubescens, Neonotonia wightii, lablab and stylosanthes guianensis will help replenish nitrogen in the soil and increase overall yield.
Harvesting
After planting, harvesting starts 3-4 months later (5 months for Brachiaria propagated via cuttings) when the plant attain 1-1.2m height. It will be more nutritious at this stage than when left to grow taller. Afterward harvest every 6-8 weeks when they attain the same height. Harvest interval for Brachiaria may be 5 weeks in the rainy season and 8 weeks in the dry season.
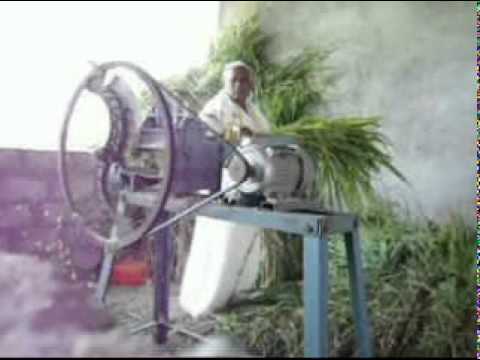
Cut and carry the grass to the animal. Don’t allow them to graze on it to avoid damage to the grass. Brachiaria grass can be grazed moderately without problem. Harvesting can be made easier with a brush cutter like the one shown in the picture below.The grass can be chopped into small pieces with a grass chopper. This will result in less feed wastage. Chopping is also required if you want to make silage.

Brush Cutter
Courtesy of youtube.com
Chaff Cutter
Courtesy of Youtube
Important! Leave a stump of 10-15cm during harvest. This influence yield quality and how long the grass will survive. Anything less than or above this range has been found to give poor result.
During the rainy season, you may have more grass than you need. In this time of abundance, the best thing to do is to preserve the grass by turning them into hay or silage. If you do this you’ll have enough grass that will last through the dry season.
Feeding
Note: Napier grass is deficient in a lot of important minerals and nutrients. So animals fed napier grass should be given a balanced mineral mixture and extra concentrate feed. To show you how important this is, below is what happens when napier grass was fed to dairy cows with/without a protein-rich forage (Courtesy of A.B. Orodho):
Scenario 1. Crossbred cows (Ayrshire /Brown Swiss x Sahiwal) when fed on Napier grass only will consume about 2.2 kg dry matter of Napier grass (i.e. 8.8kg Napier grass, assuming the grass has 25% dry matter) per 100 kg body weight. This will provide enough nutrients for their maintenance and about 5kg of milk.Scenario 2. Cows fed on Napier grass and supplemented with about 8kg of fresh leucaena (2kg dry matter) will consume about 2.8kg of dry matter per 100kg body weight.
This fodder mixture will provide enough nutrients for maintenance and about 10kg of milk daily.
Scenario 3. A crossbred cow weighing about 400kg at peak milk production should be offered about 12kg of dry matter per day. For the cow to produce 15 kg of milk per day it should have available feed at all times.
Conclusion
With this knowledge, I am confident that ruminant farming is a very attractive venture that should not be left in the hands of the Fulani tribes. It is open for everyone to explore. So join me to explore it.
Hi,
Please where can I get the seeds of the Brachiaria grass to buy for planting, as I’M planning to start livestock farmimng
Abiodun
08089684314
A commenter once posted this:
Seyi
February 11, 2020 at 10:05 pm · Reply
· Edit
I was fortunate to get a sack of brachiaria seed when i started my dairy farm. It is a truly wonderful grass, fast growing lush, easy to handle, dry weather tolerant and highly nutritious and loved by animals. I have some seed from my last harvest you can contact me (Seyi) on 07063463851
.
Buy at your own risk.
Anyone interested in a workshop about Forage production
I love the method so much. But my question is, I planted nappier using the same method but I spaced it with 2 feet instead of 3feet; is it still okay? Thanks
So long as you fertilize well it is ok.